This site is intended for Medical Professions only. Use of this site is governed by our Terms of Service and Privacy Statement which can be found by clicking on the links. Please accept before proceeding to the website.

GLENOID LABRUM MRI SIMPLIFIED PART 1: There’s a Pear in There
The problem: A lot of the difficulty people have in reporting shoulder MRI and particularly the glenoid labrum is in having a clear understanding of the MRI anatomy. This leads to confusion in differentiating normal glenoid labrum variants from labral tears and SLAP tears.
The solution: The humble pear. Only a few dollars a kilo but priceless in better visualising the practical glenoid anatomy.
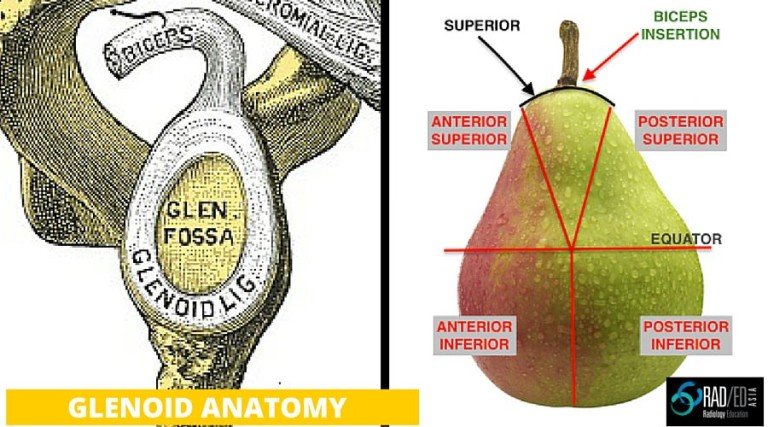
What to Look For: When you look at the glenoid on a sagital MRI it looks like a pear. So lets use the pear to divide the glenoid into the important quadrants when reporting shoulder MRI. Using this, diagnosing labral and SLAP tears and differentiating them from normal variants becomes much easier.

- The Equator: Divides glenoid into superior and inferior halves
- On axial MRI images, approximately 1/2 way down the glenoid is the level of the equator
- Use this as your marker for superior and inferior halves
- Biceps insertion at the Superior quadrant is a useful landmark in helping to differentiate normal labral variants and SLAP tears
- Labral variants occur in the Superior and Anterior Superior Quadrants
- Mostly, normal variants do not extend posterior to the biceps insertion or inferior to the equator.

